
Ever wondered what if you open your Mac and any important file won’t appear at its original location? Such distressing instances can happen with anyone any time. Whether it’s due to accidental deletion, macOS update, hidden files, or even drive corruption, missing or disappeared files on Mac can put you in trouble.
Fortunately, several free Mac data recovery software tools as well as built-in recovery utilities are available that you can try to recover your missing files. In this article, we’ll explore different methods on how to recover files disappeared from Mac. Just go with these workarounds one by one to get your files back effectively.
Common Reasons Why Files Get Disappeared on Mac
Before using any free Mac data recovery software or other options to restore missing files on Mac, try to understand the exact causes behind missing files. This will help you determine the right Mac data recovery approach.
Some common reasons why files disappear from a Mac include:
- Accidental Deletion: You might have accidentally deleted files while clearing clutter or managing folders on your Mac.
- Empty Trash Folder: Every deleted file on Mac goes to the Trash folder for some time. Emptying the Trash removes all the files permanently from your Mac.
- Hidden Files and Folders: macOS consists of a hidden folder in different apps that hides certain system or user files by default to prevent accidental modification. Before applying any data recovery workaround, it’s important to ensure that files are not simply hidden.
- macOS Update or Upgrade: Sometimes, installing latest macOS or app updates lead to changes in the directory structure or corrupted Spotlight indexing, causing data loss on your Mac.
- Corrupted Disk or File System: A damaged drive or corrupted macOS file system can cause files and folders to become inaccessible or vanish.
Where to Find Disappeared Files on Mac – Initial Checks
When you find any file disappeared on your Mac, it’s important to immediately proceed with an adequate recovery workaround. Before you use any advanced Mac data recovery method, check these simple locations:
1: Search with Spotlight
Instances may occur that your file is not actually deleted from your Mac, it’s just misplaced to another location. In such cases, you can use Spotlight to search for required files across multiple locations. For this:
- Press Command (⌘) + Spacebar to open Spotlight.
- Type the file name (or part of it) you are looking for.
- Check under Documents, Downloads, or Desktop results.
Once you find the file, right-click on it, select “Show in Finder” to view its location.
2: Check the Trash Folder
As mentioned above, deleted files go to the Trash folder and remain there until permanently erased. You can follow the below steps to recover your missing files using Trash:
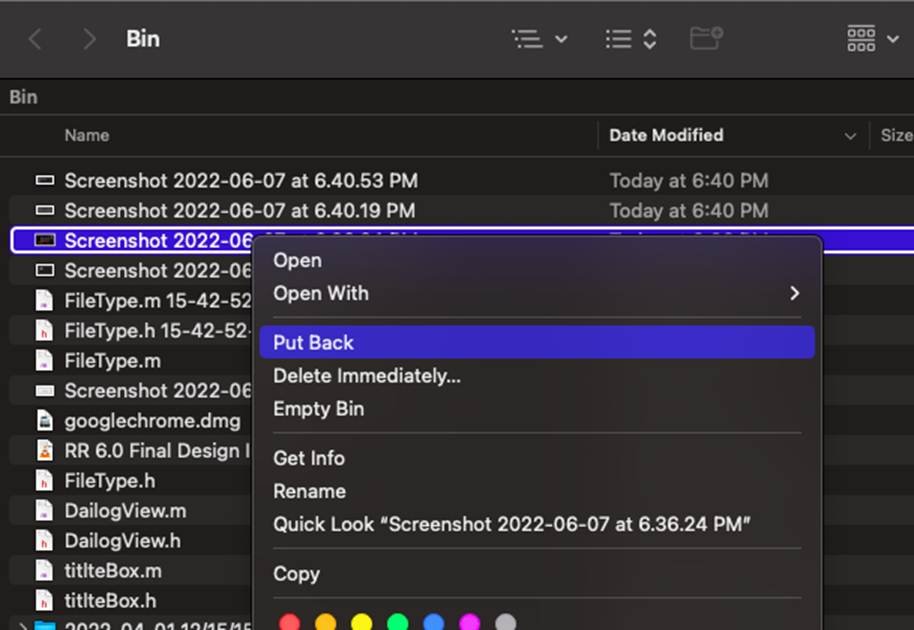
- Click the Trash icon from the Dock.
- Browse for your missing files until you locate the required one.
- If your file is there, right-click on it and select Put Back.
- This will restore the selected file to its original location.
3: Check Different Folders/External Drives
Sometimes, the required file is misplaced to a different location. In such a case, you can check the Downloads or Document folder to ensure the deleted file is there. For this, open Finder > Go > Home Folder, and check Downloads, Documents, and Desktop.
Other Alternatives to Find Disappeared Files on Mac
If your files are still missing after trying the basic recovery steps, proceed with the following advanced methods to locate and recover them:
Method 01: Recover Using Time Machine Backups
macOS provides an in-built Time Machine backup utility which when enabled on your device automatically creates backup of your files. It allows you to go “back in time” to restore previous versions of your files or even your entire Mac. Follow the below steps to find missing files using Time Machine:
- Firstly, connect the Time Machine backup drive to your Mac.
- Now, go to the folder where the missing file was originally saved (e.g., Documents or Desktop).
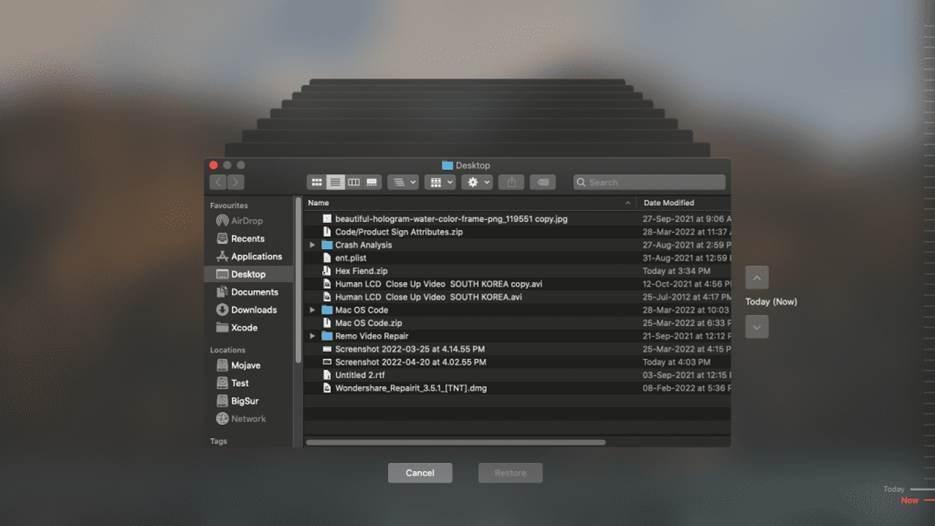
- Click the Time Machine icon from the menu bar and choose Enter Time Machine.
- Browse through previously created backups using the arrows or timeline from the right pane.
- Locate and select the version of the file or folder you want to restore.
- Click Restore to save the selected file to its original location.
Tip: If the Time Machine icon does not appear in the Dock, open System Settings > Time Machine > Show Time Machine in the menu bar to enable it.
Method 02: Recover Files from iCloud
If you’ve synced your Mac with iCloud drive or created a backup using iCloud.com, you can also recover your data from there. Follow the below steps to restore your disappeared files using iCloud drive:
- Open a web browser and visit iCloud.com.
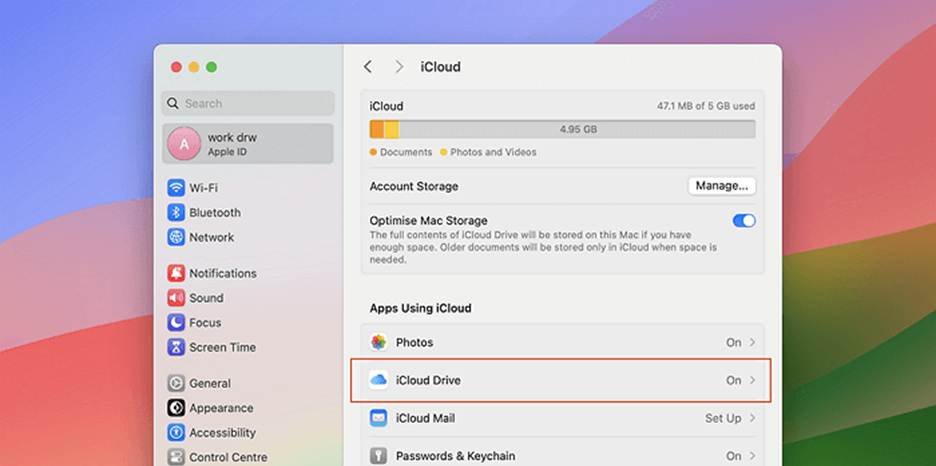
- Sign in with your Apple ID and click on the iCloud Drive icon to view your stored files.
- Now, go to the Recently Deleted folder located at the bottom-right corner.
- Locate and select the file(s) you want to restore.
- Lastly, click Restore to recover the selected files back to iCloud Drive.
Method 03: Use Third-Party Free Mac Data Recovery Software
If the deleted files are not in Trash or you don’t have any backup, then try third-party free Mac data recovery software tools like Stellar Data Recovery Free for Mac. This all-in-one tool performs through scanning of your storage device to recover lost or disappeared files. The software supports recovery of files from Mac internal drives, external hard drives, SSDs, USBs, and even Time Machine backups.
Key Features of Stellar Data Recovery Free for Mac:
- It supports recovery of various types of files, including photos, videos, documents, emails, etc.
- This software can also recover files from APFS, HFS+, exFAT, and NTFS-formatted drives.
- It is compatible with macOS Sonoma, Ventura, Monterey, and older versions.
- The free version of the software supports recovery of up to 1 GB of data for free.
- It offers Deep scan option to recover files from severely corrupted drives.
Here’s how to recover disappeared files using this free Mac data recovery software:
Step 1: Download and install the Stellar Data Recovery Free software from its official website on your Mac.
Step 2: Launch the software, select the type of file (Documents, Photos, Videos, etc.) that you need to restore and click Next.
Step 3: Choose the storage drive where the disappeared file was earlier stored and click Scan to initiate the scanning process.
Step 4: After completion of the scanning, preview the recoverable files to confirm recovery before saving. Click Recover to save recovered files to a desired location on your Mac.
Additional Tips to Prevent File from Disappearing on Mac
You can consider the below tips to avoid issues like missing files on your Mac in the future:
- Enable Regular Backups: Create back up of all your important files and folders using a reliable cloud service like iCloud, Google Drive, or Dropbox or in-built Time Machine backup utility.
- Avoid Force Shutdowns: Unexpected system shutdowns can be a probable reason for your disappeared or lost files. To prevent this, connect your Mac to a UPS or ensure a stable and uninterrupted power supply.
- Keep Apps/macOS Updated: Regularly updating apps or OS of your Mac fix bugs and file system issues that may cause files to vanish unexpectedly.
- Monitor iCloud Sync Settings: Ensure iCloud Drive syncing is complete before disconnecting from the internet or signing out of your Apple ID.
- Install Reliable Data Recovery Tool: Check all the features of free Mac data recovery software that you are going to use for your file recovery.
Wrapping Up
Files disappearing on your Mac can be painful, but the aforementioned data recovery methods help you understand how to recover files disappeared from Mac. With the right combination of basic checks, backups, and third-party Mac data recovery software tools, you can easily restore your disappeared or lost files. Also remember — prevention is better than cure. Regularly back up your important files and avoid abrupt shutdowns or unverified cleanup tools to prevent unexpected data loss issues.


